How to Harvest Rainwater
Posted by David Grau on
Originally Posted on March 28, 2014
David and Carla attended the 5th Annual Seed Swap a few weekends ago, which was organized by Sherri Scott of the GRUB Education Program, and Stephanie Ladwig-Cooper of the Chico Permaculture Guild. It was a great community event, with crowds of people coming through to share seeds, and talk about gardening.
We hope your community has events such as these, and if not, perhaps you could start one.
How to Harvest Rainwater
One of the simplest ways to harvest rainwater, and keep it around your garden for a while, is to direct the flow of water from your downspouts into mulched garden basins. Mulch slows evaporation and, when the organic matter decomposes, it adds to the sponge-like, water-holding capacity of the soil. Plants can draw from that sponge longer into the warm season, lessening the need for irrigation. When it is time to irrigate, that sponge will hold your irrigation water longer.
Downspout extenders can be used, or you can make a shallow trench to direct the water from your downspout to your basin.
We have a downspout that directs the flow of water across a sloped pathway into a 3ft wide basin which is surrounded by fruit trees, perennial herbs, and some small berry bushes. Fallen leaves, pine needles, and other organic matter collects in the basin, to which we add roughly-chopped small branches, straw, and other organic matter we come across. The rough material creates pockets in which the finer material gets trapped and lingers. Over time more and more organic material will collect, decompose, and increase the soil "sponge."
Sizing your basin to handle the amount of water from your downspout should be considered. You can get an idea of how much water will come through your downspout by taking the measurements of your roof, and using the calculators at Brad Lancaster's excellent website harvestingrainwater.com. You'll also want your basin to have an overflow outlet (which might be another planted basin), so the water doesn't flow back toward your building.
By increasing the water-holding capacity of your soil, and directing water to it, you'll be making an important step to helping conserve one of our most precious resources.
Removing a Lawn to Grow Edibles
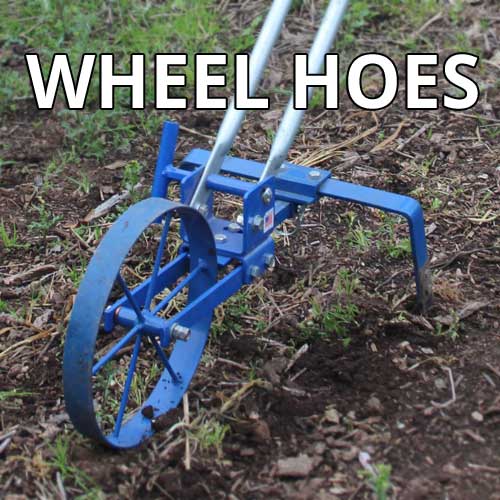
We've been working on getting rid of a final patch of lawn in one of our gardens and transforming it into a food garden. We've used the Valley Oak Wheel Hoe to cut sod, which is often the desired first step in the lawn-to-food transformation. Other grass removal techniques include broadforking the lawn and then raking or hand pulling the loosened sod, shaking the soil off the roots.
When using the wheel hoe we recommend sharpening both sides of the hoe blade so you can cut the sod until the front side of the blade gets dull, then turn the blade assembly around to cut some more. We prefer this to renting gas-powered sod cutters. Once your sod is removed, you can attach a cultivator to the wheel hoe, and work up the soil to get it ready to plant. If you use the broadfork method, raking the soil will help find any remaining bits of grass roots.
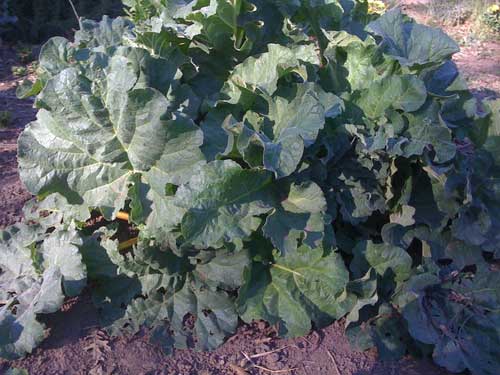 We planted some rhubarb (photo right) in our garden. We like it because it is a perennial and it is quite decorative. We also put in an almond tree, and then sowed seeds of various plants, including lettuce, arugula, sunflowers, and dill. The mix of plants will help attract beneficial insects and pollinators to the garden, and increase biodiversity. The mix of leaf shape, texture, height, and flowers will also be quite beautiful!
Until next time, happy spring gardening!
Hummingbird Nest
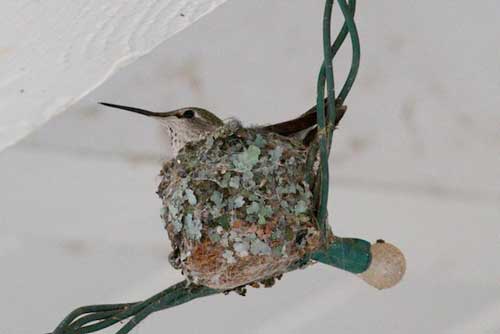 In our last blog we had photos of our hummingbird fledgling and of a hummingbird hen constructing a new nest. That little hen has built up the nest into a beautiful cup, and she has been dutifully sitting on it night and day. She'll fly off to eat, and bring back little bits of fluff in her beak, which she tucks into the nest. She also adds little bits of lichen to the outside, to help camouflage her nest.
We expect the eggs to hatch fairly soon, and then she'll be spending time collecting food for the little hatchlings, as well as keeping them warm. We'll be posting photos of the hummingbird progress on our Facebook page, so be sure to like us on Facebook!
Shop Now

Share this post
- 0 comment
- Tags: broadfork, gardening, harvesting, wheel hoe